Thursday, November 29, 2012

1st batch of Mead (2 gallons)

I like mead, warm or cold.  Homemade stuff is usually way better than what you can pick up at the state store, save a few.  I wanted to get some going this summer, but I had a difficult time finding some decent raw honey.

Luckily, a friend at the pottery studio had a line on some raw honey from an orange/palmetto farm and she picked up a few pounds of it for me.

This stuff is just about raw as it gets.

Fresh off of the comb.  They cut the comb straight into the jar.  No pasteurizing or watering down.

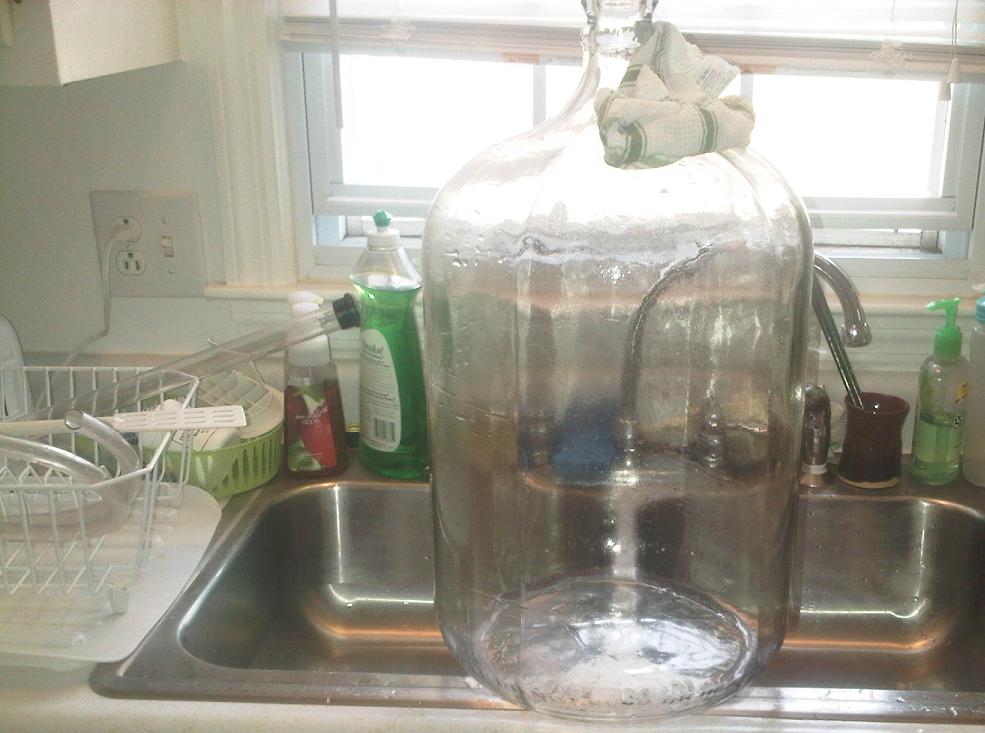
Perfect for brewing mead

Oh, and it tastes very very good.  It has a light orange or citrus taste too!  It is very thick and you can see that the sugars have started to chunk up and crystallize a bit. 

It was a major pain in the ass to get it out of the jar though.  I soaked the jars in some warm water a bit and used a rubber spatula to get it out.


When I poured the honey in the brew kettle, I heated the honey lightly to help it dissolve.  A lot of mead makers do not recommend heating honey, but since this is so raw, I did heat it but kept it under 160F.

I had researched a few recipes, such as the legendary "Joe's Ancient Orange and Spice Mead" and used some of "Malkore's not so Ancient Orange Mead" recipe  (homebrewtalk.com) to create my own adaptation. 

Here is what I used:
 6 lbs of raw orange blossom honey
 1 medium sized orange, Zested and Juiced
 1 cinnamon stick
 1/4 tsp of clove
 1 packet of Lavin EC-1118


So first I zested the orange, making sure not to get any of the white pith.  Then I cut the orange in half and juiced it.  I set both the zest and the juice to the side to use in the brew and threw the rest away.

I heated up a gallon of distilled water to about 155F.  Then I added the raw honey and stirred it well to dissolve everything. I brought the heat back up to about 155F and held it there for 10 mins.

Next, I added the orange zest, orange juice, the cinnamon stick, and the clove.  I let this steep for about 15 min. and stirred it frequently. Then removed it from the heat

I gave it a water bath to cool it down quickly.  While the water bath was happening I re-hydrated the yeast...  Some people dont, but with this strain I always have better luck when it is re-hydrated with the warm water (biology and chemistry in action, with the water helping the yeast cell membrane re activate properly and decrease the likelihood that the yeast will die of infections before adequate fermentation begins, or whatever!).

While transferring the mead into the fermentation vessel, I ran it through a cheese cloth to filter out the cinnamon stick, zest, and pulp.  Next time, I will probably throw all of this stuff in a grain bag to make it easier.

Once in the vessels (I ended up using 2 plastic 1 gal jugs, im saving the glass ones for the secondary), I split up the yeast in equal parts (make sure you suspend it well by rapid stirring before your measure it out) and then added equal amounts of water to top it off and get a SG of 1.094

That should be about 12.5% ABV if the yeast makes it that far. 


Im at 1.050 right now, after a little more than 2 weeks in the fermenters.  I will give it at least another week and check it again before I rack.


Tuesday, October 23, 2012

Pumpkin Ale Plan

I'm all geared up to make some Pumpkin Ale...Ive got my grains, malt, hops, pumpkin, and yeast.  I just need to bottle the Chianti before I get started so I have the fermenter ready. 

 This is a basic recipe:

4½ lb Pumpkin
2¼ lb malt extract (Im using a light dried malt extract)
2oz dried hops (optional, but i am going to throw in about an ounce of some Hallertau)
1½lb sugar or pale dried malt extract  (Since my ex
26 pints of water
Ale yeast

My alterations to the recipe to bump it to 5gal and to fit what I have:

4½ lb Pie Pumpkin (roasted for 30min - 1hr)
6 lb malt extract (Im using a light dried malt extract)
1oz dried hops - Hallertau
1 lb briess creamy malted  red wheat (steeped, this will give me some good color and flavor too, hopefully)
1/2 lb brown sugar
1 tbsp pumpkin pie spice mix
Ale yeast

This should do pretty well for a 5 gallon batch.  I may be about a pound short for the grain bill, but I am not sure.  I will have to bust out a calculator

From the research I have been doing, people usually over do it on the spices. they put in cloves, ginger, all spice, etc and use too much.  So I am just going to stick with 1 tbsp and see how it goes.

I will post some pics and whatnot when I get this going


If you have any tips on pumpkin ale, I am all ears!

Thursday, September 27, 2012

Limoncello

Alright,

The first batch of Limoncello appeared to be ready to bottle. 

The color seemed to have faded out of the zest pretty well and it was smelling delicious. 


So I got to work and cooked up the simple syrup.

I used the same recipe that I used for my Limecello.

1 cup sugar to 1 cup water.  Some might think this is too sweet, but remember I'm using straight grain alcohol, not watered down vodka : )


I filtered the brew off of the zest into an amaretto bottle I had sitting around.  Recycling FTW

But there was still quite a bit of color left on the zest unfortunately....  So I think that the lemons take longer than the limes to brew.

Next time I will wait a bit over 2 weeks and check the zest better before I filter the alcohol off of them. 


The color is still amazing, and it certainly tastes delicious.  It seems to need a little something.  Probably a bit longer on the zest and maybe I will throw the zest of a lime or two in there as well next time...
I managed to get this and my Chianti going and make it out to the
beech just before sunset!!!


Saw a bunch of birds chasing a school of fish up the coast, the tide was pretty high and right on the tail of the fish was a crap ton of Tiger Sharks!  I couldnt get any good pics with my phone but they were pretty crazy!


Wednesday, September 12, 2012

I bottled the Limecello last night, it has a great green color and is very smooth.

Also, I am experimenting with some Limoncello now.  I just zested a dozen lemons and have them mixed with the alcohol.  I'm going to follow the same recipe that I made for the Limecello for now, to see how it turns out.  I will probably tweak it later on.

I'm pretty excited that all of the Autumn or harvest style beers are coming out in the stores now.  Finally! they are some of my favorite. 

Unfortunately, my favorite seasonal brew from Leinkugel's (their octoberfest) was already sold out!  I picked up a 12 pack of Sam Adam's Oktoberfest to satisfy my thirst.

I am planning on brewing about 5 or 6 gallons of mead.  I'm waiting on some local honey.  I'm thinking a cider would be awesome as well.

Saturday, September 1, 2012

no fermentation

Well, the popcorn ale did not ferment naturally.  I tried throwing in some champange yeast to see if I could get anything going, but no luck yet.  Maybe some more time will help it out...

I just purchased a dozen limes and a dozen lemons.  Im making a batch of my Limecello and I am going to make a batch of Lemoncello while Im at it.  I'm hoping to get it started tomorrow morning before things get too busy.   I will throw some pics up here when I'm done....  just found out a micro brew is going to be built in town.  I'm a big fan of micro brews but I'm sorta jealous, I've been seriously looking into opening one myself.

Thursday, August 9, 2012

rackn

The fermentation is complete and I've started to rack the experimental popcorn/malted wheat brew.  The flavors are much more subtle now (unfortunately) but it certainly has a kick.  I'm not satisfied with the taste just yet though. 

I decided to add a bit more ground cinnamon and to give it some more time to sit.  Hopefully, it will clear up some because it is still more cloudy than I want. 


I'm planning to make some gruit here soon.  Gruit is, basically, a very old style beer/ale that uses herbs other than hops to get the aroma, flavor, and bitterness that the different kinds of hops normally add.  I've done a bit of research about the herbs that were commonly used in the past, and I have some growing right now.  I need to pick some other ones up, but it sounds like it will be tasty.

I'm also planning to make a gluten free brew.  Not sure about the ingredients quite yet, but that is partially what this previous experiment was all about....using corn.  I will need to make a recipe that eliminates the malted wheat completely.  Corn and rice are two of my reasonable options.  I know that corn is often used in mash and rice has been used for thousands of years to make alcohol...so it is possible

Tuesday, August 7, 2012

New Pages and Content Coming!

I am adding new sections  with recipes to the blog!

I put a handful up on a new page that are small, easy to make batches that anyone can do with stuff around the house or a trip to the store and keep it under $10.  They aren't the most 'refined' or sophisticated brews but it is great to drink something you made yourself.  If you are new to brewing, they should be pretty straight forward.  If you are a Vet, experiment with your own tweaks and alterations.  Most of these brews get better with time too.

I'm not sure how exactly to organize the recipes.  I put them on a new page, but I can't edit the page well enough for what  I want to do, it just makes one big post.  Anyone have any ideas on how to make the recipes page more accessible/organized?

Sunday, August 5, 2012

Another experiment

I had a bunch of of old un-popped popcorn laying around an I got to thinking....I should try to make some alcohol with it.

Im not completely sure I can get the right starches out of the popcorn without popping it first.  But I gave it a shot.

Since it was a test, I only made about a gallon of the brew, here is recipe I used:


4 qts water heated to 140F
2 1/2 C popcorn kernals
    Hold at 150-160F for 20 min
1 C red malted wheat, lightly crushed
    Hold at 150-160F for 10 min
Boil and hold for 20 min
1 C brown sugar, 2 C white sugar, 1/2lb rasins
    Boil 10 min
Remove from heat, add  ground cinnamon, vanilla extract and some almond extract.
Then pitch some yeast in there and let it sit.

I tasted the mash before adding the yeast and it tasted like liquid pumpkin pie.  I hope it holds some of that flavor after it ferments, but I am sorta doubtful.

It has been a little over 1 week and the fermentation is slowing down so I am going to rack it and give it a taste. We shall see!


Friday, June 1, 2012

Skittles Infused Alcohol?


I decided to try out the infamous Skittles Infused Vodka recipe.

This recipe is from an info-graphic by Iheartmonster that floats around the web quite often.  I made a few alterations for a test run.

I followed the info-graphic for the most part, but I had no vodka.  I used everclear instead...which caused a bit of an issue.  I also used a small bag of skittles and had just enough to make to make a small batch.
 

You need 60 skittles of one color ( i used red and there were only 60 in the small bag) per 6 .oz of vodka ( I used everclear).

The steps:
-separate the skittles by color
-add 60 skittles to a clean and empty plastic water bottle (or another bottle)
-add 6 .oz of vodka
-shake and let the skittles completely dissolve.  (lots of shaking or let it sit over night)
-filter the brew threw a coffee filter
-refrigerate 

This only makes about 8 oz per color.  I only did red for the experiment. 

In the end,  the skittles took a very long time to dissolve because I used everclear instead of vodka.  There is a solubility issue because vodka has much more water than everclear.  It still worked and tasted great though.  I added some seltzer water to it and it made a tasty drink.  I would recommend getting a larger bag of skittles and using vodka instead of everclear like the info-graphic suggests.

Im going to start up a batch of Chianti here soon and make some more smash

Thursday, March 29, 2012

Porter carbonated and other updates

Here are some updates with the brews I have been working on lately:

The Porter is finally carbonated!

The kit said it would take roughly 2 weeks to carbonate, yet it took nearly 4.  I have read about darker beers and lagers taking more time to reach the appropriate carbonation levels, so that appears to be true.

The taste is excellent.  I would compare it to Yeungling Porter, although the spices and hint of chocolate remind me of Sam Adam's Holiday Porter.  So needless to say, I am very pleased.  I think I'm going to try to make a reduction out of this for some brisket or for a steak marinade...


Wine / Bar Cupboard??


This cat condo, I mean TV stand, was acquired for free.  A friend was moving and had no room for it so I am going to convert it.  There is an adjustable shelf inside the cupboard portion, so that gives me a few options.  I am thinking about creating a wine rack in the bottom portion and perhaps a mini bar cupboard/stand in the upper portions.  I can attach a bottle opener and a towel rack and maybe do some other things.  I may sand and stain it as well.

Any suggestions would be appreciated. 


 Chocolate mint tea champagne (lol)

I finished off my experimental chocolate mint tea champagne.  It was carbonated very very well and would foam like a freshly opened champagne bottle unless it was kept chilled.  I think I need to use a little less yeast if I do it again, or perhaps rack it one more time to keep the yeast flavor down, even though champagne yeast is pretty mild.

I will definitely make some of this again.  I just need to score some fresh mint and dry it out. 


My planned brewing list:
Chianti -kit is here, just looking for some spare time
Limecello -almost out, and is too good not to always have it in-stock
Smash -I nearly finished off my Smash on St. Patrick's day, so I need to get more of that brewing soon because it takes at least 7 weeks before it is drinkable and about another 4 before a normal man can handle it

Monday, March 12, 2012

Bottling the Porter

The porter cleared up pretty well in the secondary and the SG had held steady for a few days.  So it was time to bottle.

I just ordered this capper online.  Workers very well for a hand-held and you cant beat the price. 

After cleaning and sanitizing everything I prepared the corn sugar (helps create the carbonation) and siphoned the beer out of the secondary carboy and into the bottling bucket.

I did run into some trouble though.  I ended up being short on bottles.  These caps and capper only work on american style bottles. 
 
In the pic you can see an American style bottle on the right and a European style bottle on the left.  The difference looks pretty small but...


<---This is what happens with the European bottle

The caps don't grip and they can easily be knocked off, they hold up to the carbonation nor keep out the O2.  So I lost quite a bit of bottles this way and ended up searching around the joint for some other bottles that could be capped.   I found a few and also found that champagne bottles won't work (at least with this capper) even though they have a good lip for a cap because the neck has a bulge where the wire tie downs often rest. 


I ended up with 46 bottles total (minus what I drank while bottling) I threw the rest of the brew in a sanitized gallon jug.  I have been drinking from that to keep me from opening up too many bottles before the carbonation sets in (takes 2 weeks with the priming sugar).  The stuff still tastes great even though it is flat.  So I'm excited to see how it ends up here in a couple weeks.

Friday, March 2, 2012

Random experiment

Last night I decided to mess around with some left over ingredients I had.  With a bunch of lime juice left over from the Limecello, some yeast I needed to use up, and whatever else I could find I whipped up this odd brew.

8 cups of hot water, chocolate mint leaves, lime juice (20 limes), 4 cups sugar, 1/4 tsp yeast.
Basically I made a big batch of mint tea, added a crap load of sugar, and pitched some yeast in it. 
It has a high SG with a capability of producing 18% ABV.  The yeast I used won't go that high, and it is a type of champagne yeast, so it should be bubbly but not too alcoholic.  I needed to use the yeast up.  I had been using it for homemade root beer and ginger ale.

Here is an awesome way to make homemade tea bags 

This should work for most kinds of herb.. and other materials..

 Here are some raw chocolate Mint leaves that I have dried.  I usually add them to tea for a bit of extra flavor.

You can't easily open up a tea bag and add your own stuff without it leaking out into you water.  There are metal and plastic capsules you can buy that act as reusable tea bags, but I don't have a lot of cash and I don't know where to buy one in stores. 


So all you need is a coffee filter and a rubber band.


First, strip the leaves off of the stems.  I did this over top of a paper towel so it is easier to transfer any little pieces.

Then pick out any stems that broke off with the leaves.  You can leave them in, but some stems don't add flavors you are looking for.


Next, grab these pieces, or just pour them with the paper towel, and put them into a coffee filter.  Now just crush the leaves up with your fingers.  If your herb is dry this will be very easy.

Then you want to start bunching up the coffee filter by gathering up the top of the filter slowly.

See how the sides of the filter are like an accordion?  Bring the sides together like how an accordion closes. 


Then give it a little twist and secure it with a rubber band.  This is what it will look like, a little bag but not so tight that the herbs can move around inside a bit. 

Just drop this in your cup/teapot/pot or whatever and steep it like a normal tea bag.


It is not hard to do and it is cheap and disposable


Monday, February 27, 2012

Beer Brewing First Attempt

I normally brew wine, but everyone loves beer...including me.  

I have been desperately wanting to brew some of my own for a while and finally managed to score a large enough pot.  From brewing wine I have almost all of the equipment needed to make beer, aside from a big pot to boil the wort in and a few minor things.  You need to get a big stainless steel pot, mine is 20 quarts (5 gallons) and is considered small by the local home brewers in town, but will work fine.  These pots are a bit expensive and sometimes tough to find.  I found some online, however I found one on sale for a quarter of the price at a local shop. Just lucky I think.


For this batch, I am using a liquid malt extract (LME) kit.  I have most of the materials to do this from scrach except some hops, but since it is my first time I decided to try a kit out.  This is a Porter with some mild spices like coffee and chocolate.

This kit had 2 LME canisters, grains, flavoring spices, grain steeping bag, 3 bags of hops, yeast, priming sugars, and about 60 bottle caps.


So I had to have: a big pot, a big spoon for stirring, a thermometer ( I used a metal meat thermometer, looks like a big nail with a gauge at the head),
a heat source ( yes, it is possible to do it on a crappy stove like mine, but a big propane burner is often used by home brewers, the kind used for turkey deepfrying. there are other options like pots with electric elements in them),
something to cool the wort down quickly ( I used my sink with ice and water, a wort chiller is much better at doing this ), and a primary fermenter with an air lock.

Making the wort is mostly adjusting heat and stirring until your arm falls off.  First, you heat some water until it is between 155-165 F and you steep the grains and spices for 20-25min.  Then you take them out and bring the pot to a boil and add the LME to the water and boil for 20-30 min. Then you add the hops at 3 different stages.  This recipe had the first hops boil for 30 mins, second bag of hops for 25, then the last hops for 5.

At that point I had to rapidly cool the pot down to 70 F without adding anything to the liquid.  So I filled up a sink with ice, salt, and some water and put the pot in there.  I noticed this wasn't working as well as I hoped and started to fill my other sink with cold water and ice.  I switched the pot back and forth between the sink tubs and stirred the brew every once and a while to have it come in contact with the cool sides of the pot. 

Once this was finished, I poured it into the primary bucket and added some water.  MAKE SURE you test the specific gravity before you add the water and WHILE you add the water too.  This kit is supposed to yeild about 5 gallons, but my brew was just about to fall outside of the right SG range at a bit over 4 gallons.  So, if I were to keep adding another gallon, I would have ruined the flavor of the beer and possibly greatly reduced the alcohol content or worse.

I estimate this batch will yield 43 bottles if my terrible math skills are somewhat accurate.

The beer has been sitting in my primary for 6 days.  I have to decide whether or not to use a 2 stage fermentation where I would place the beer in a glass carboy (like a wine's secondary fermentation) to clear up.  I have been reading that this step is not really necessary if you use quality yeasts.  I think I am going to do it to clear it up a little.

Tuesday, February 14, 2012

Limecello, 2nd batch

Long time, no post.  I have been busy with school lately, I'm in my last semester of graduate school and have a lot going on right now.

Anyways, the first batch of limecello tasted so good that I wanted to make some more, I am making a double batch.  20 limes this time.  I want to make it better too.  There was some bitter flavor in the first batch so I am trying to find a way to get rid of it. 

I figured the bitter flavor could have come from one of two things: Wax on the outside of the lime or pith was on the zest. 

I got the limes on sale but it is hard to find any organic limes in this area, especially this time of year, and they are often sprayed with wax.

I soaked the limes in soapy water and scrubbed them with a vegetable / potato scrubber and rinsed them really well.  Hopefully that eliminates any possibility of wax altering the flavor and screwing things up.


  I also scored a new zester from Target.  It does a pretty good job of taking only the outer layer of the peel and not getting too deep into the flesh.  This should have greatly reduced the amount of pith that might get put in the brew.


The zest shavings are extremely fine and the color of the brew turned dark green in the matter hours rather than days like the last batch. 


The stuff is so dark right now you cant see light through it.  It should be ready to be mixed with the simple syrup as early as Friday. 

Wednesday, February 1, 2012

Bottling the Kiwi Melon Pinot Grigio

Finally, bottling day.  It is an exciting time but also comes with a lot of work.

You should only bottle totally clear wine.   If it is still cloudy or has little bits floating around it in, let it sit for a while longer.  You can filter your wine once its cleared up, but there is a possibility that you will alter the taste when doing so.  I decided not to filter this batch.

Here is a before and after of the wine to show the clarity.
Before, looks like OJ
After, clear as glass

Since the wine was cleared up well, it was time to start the cleaning and sanitizing once again.  I needed to clean, sanitize, and rinse the:
6 gallon fermentor
bottling wand
spigot
racking tubing
30 bottles
30 corks
I collect as many wine and even champagne bottles as I can and try to get them off of friends as well, so its like recycling and it saves me money.  If your in a pinch for bottles, hit up big lots, or a dollar store and sometimes you can find sparkling ciders or other stuff to salvage the bottle at a cheap price.  These boxes are from a liquor store and can even form a makeshift cardboard wine cabnet if you lay them on the side.


Cleaning all the bottles takes a bit of time, especially because of the labels.  I think some wineries make their labels huge, colorful, and covered in glue because they can only sell a bottle because the label looks cool...not because it tastes good.

So what I do is fill a sink with soapy water and soak the bottles that still have labels on them.  This gets the cleaning part done at the same time.  I scrape the label off with a plastic scraper or a butter knife.  And to get that film off under the paper, I use rubbing alcohol.
The thread of a normal water sprayer bottle and the bottles of rubbing alcohol are usually the same, so here is my tricked out alcohol sprayer ------------->


 Don't forget to rinse the bottles well after cleaning and after sanitizing.

Once everything was cleaned and rinsed, sanitized and rinsed, I put the carboy up on the table and started siphoning.  I like to siphon back into the fermentor because it has a tap or a spigot that is controllable, my bottle wand fits in the tap, and I can focus on not getting the lees (white gunk) in the bottles.

<--- This pic shows the carboy towards the end of the siphoning.  You want to avoid getting that crap at the bottom in your bottles.  Pay attention when siphoning, because you will suck up the stuff on the bottom when the tube is about an inch above it.

I lost my siphon just after this point, and the wine left in the tube flushed back into the carboy, stirring up all the nasty gunk.  I couldn't siphon any more out because I didn't want that stuff in the bottles.  So I estimate I lost about 1 to 1 1/2 bottles from that.


Its all easy after your done with the siphoning.  Just start filling up bottles and corking them.  These labels came free at the shop where I bought the kit.  Sometimes I just use some tape and a marker.  I wrote the date I bottled on each bottle.

In the end I got 27 bottles.  Well, 26...I drank one bottle while bottling.

This stuff turned out better than I expected.  It is the first fruit flavored wine I have done.  It is rather sweet and you can clearly taste the kiwi and the melon.  It finishes with a slight crispness that you get with Pinot Grigio.  I think the flavor of the pinot will come through more with time.  But this stuff is so tasty it may not last very long.


Sunday, January 29, 2012

Finishing the Limecello

The limecello was ready to be finished up this weekend. 

The color in the peels was gone and the juice had become a very deep green.    --------->


So it was time to make the simple syrup.


To make the simple syrup, I used 1 cup of sugar and 1 cup of water.  Put them in a pot over medium heat and stirred until all of the sugar was dissolved. 

I let the simple syrup cool to about room temp while I was working on the next step.


I used a kitchen funnel and a coffee filter to strain the juice and to catch any bits of zest that were floating around.  Sometimes you have to lift the coffee filter up every once and a while because the juice will stop flowing through the funnel. 


I had an old amaretto bottle lying around so I cleaned/sanitized it and hoped everything would fit inside. 

<-----Here is the limecello in the bottle without the simple syrup.


And here is the final product, it just fit! ---->

I poured the simple syrup into the bottle with the funnel (no filter) and gave it a good shake.

It is drinkable now, but some say it will get more flavor in about a week.  So I've been sipping on it here and there to see if it changes.

This stuff is great chilled, I have the bottle in my fridge. 

It is a tiny bit bitter, I must have got some pith in there, but otherwise it is really really good.  It's pretty strong too!

So 10 limes, a little under 3 cups of everclear, and some simple syrup made about 375 ml  (like half a wine bottle).


Wednesday, January 25, 2012

Racking the "Smash"

Today I worked on whats left of the "Smash".  As you can see, there are lots of floaters and nasty stuff in there that you don't want to drink like: raisins, dead yeast, flour that seeped out of the wheat, etc. 

Last time I made this stuff, I had a hell of a hard time filtering all 2 gallons of it.  So this time I am trying something different. 

I figure I will strain all of the chunks out and put the Smash in a different bottle and wait for everything to settle down at the bottom.  Kind of like doing a secondary fermentation. 


So here's what I did


I set up a colander over top of a big (1 gal) Pyrex measuring bowl.
I poured some of the Smash into the colander but the raisins where clogging up the neck of the 2 liter bottle.  So I cut the top off of the bottle to eliminate the problem.  Then I dumped the rest of it into the colander


Here you can see all of the malted wheat straining.  The wheat has become rather soft and can be broken open just by squeezing it, revealing some bright white flour.  I let this sit for a little bit as it dripped into the measuring bowl.

Then, I grabbed a sanitized bottle and poured the Smash in.


It looks pretty nasty right now, kinda like a Yahoo or chocolate milk.  But when it clears, it will be a deep reddish brown and pack a kick.

I'm not sure how long this will take to clear up, since I didn't add any chemicals to it.  I will let it sit for a week or two and see how it is doing.

Monday, January 23, 2012

quick update

The Kiwi Melon Pinot Grigio is clearing up nicely and should be ready to bottle later next week.  I went to the homebrew haus (my local supply store) to pick up some corks this weekend to make sure I had enough to cover all of the bottles.  I think I might move the carboy up to the counter or on top of the table a few days before it is due to be bottled, instead of on the bottling day itself.  That way if I accidentally stir up any of the settling when I move it, I won't have to wait for it to clear up again.  You don't want to bottle wine that is not clear.

The limecello is looking and smelling pretty good.  I have been gently swirling the jug around to stir the mixture up a little once a day.  The Everclear is turning pretty green and the peels are losing their color.  I should be adding the simple syrup to it on saturday or sunday.  Im pretty excited, if it tastes half as good as it smells, it will be great. 

My brother has a some wine he's brewing right now.  I think it is a cabernet savignon/merlot mix.  Hopefully we can trade some bottles when we are all finished.

The only other thing I have brewing right now is the "smash".  It needs to be bottled, or at least racked so it can clear up a tad.  I think I will be working on that tomorrow or wednesday and I will have that process uploaded.


Saturday, January 21, 2012

Making limecello

I started up the Limecello this afternoon.  First I started by cleaning/sanitizing/rinsing the jug I was going to be using.  Next, I washed and scrubbed the limes under cold water to get the wax and dirt off.

Then came the peeling.  I would highly recommend investing in a zester.  I thought I had one, but I guess I misplaced it.  I used an extra sharp peeler instead.  Make sure you don't get any of the white parts (pith) of the lime on your peels or it will have a very bitter flavor.  This took a bit longer than I expected because I didn't have a zester.

I went back through the peels before I put them in the jug and picked off whatever pith was remaining, to the best of my ability.

Then I put the peels in the clean jug and added the Everclear.  Now the jug will hang out in my cabinet until next week, when I will be adding the simple syrup.


I have a bunch of limes that need to be juiced.  I'm thinking that I will freeze some of the juice and maybe make some marinades or salad dressing out the rest.

Friday, January 20, 2012

Limecello recipe

I was at the store the other day and limes are on sale, so I got 10 limes to make a test batch of Limecello.  There are not a ton of recipes for Limecello specifically, but there are plenty for limoncello.  So, I am drafting up my own by borrowing from different limecello and limoncello recipes. So here is what I plan to do:

SammyK's Limecello
Ingriedents:
10 limes
1 2/3 cups of Everclear
Simple syrup = 1 cup sugar, 1 cup water, heated on stove until sugar is dissolved.

Directions:
Zest (or peel) the limes ensuring not to get any pith (white fibers) at all, only green flesh.
Place the zest into a clean and sanitized glass jar or jug.
Add the Everclear
Set in a cool, dark place for 7-8 days or until peels lose the green color.

Prepare Simple Syrup and remove from heat to cool.
Strain the mixture of zest and Everclear to remove the lime zest.
When the Simple Syrup is cool, add it to the mixture and bottle
Let the bottle stand for a few weeks and serve, preferably chilled


I just realized I'm going to have a crap ton of limes to juice...
Maybe I will freeze the juice or use it for limeaid or something... Open to any suggestions!

I will probably start this up tomorrow because I have plans tonight.  Happy Friday everyone!

Wednesday, January 18, 2012

Racking the Pinot

     The specific gravity of the the Pinot Grigio was at .1998 so I was good to go for racking the must into the secondary fermenter.


But first I had to clean and sanitize everything that was coming in contact with my wine, these 6 gallon carboys can be a pain to clean up

After cleaning, sanitizing, and rinsing, I was ready.  I needed to siphon off about 2 liters of the pinot grigio juice to make room for the kiwi/melon flavoring and to stir in the stabilizing and clearing chemicals.  Here is my makeshift siphoning set up, I don't have an auto siphon or anything fancy so I do it by mouth.  I managed to get a good siphon on the second try.  The wine does not taste good by any means at this point, it tastes like skunk beer.


I did lose suction towards the bottom but that is fine with me because you don't want to take any of this gunk along with the juice.  That is the settling called Lees.   It is made up of dead yeasts and sediments and it is important to get ride of as much of it as possible so you have a nice clean and fine wine.

The next step involved adding sulfite, potassium sorbate, and the kiwi/melon flavoring or finishing blend.  Then came the stirring.  The insane amount of stirring needed is called Degassing.  That is when you try to get as much Co2 out as you can without adding too much O2.  Most people do it with a drill and an attachment called a whip but alas, I'm broke so I used a spoon.  After a crap load of stirring and a few more chemical packets this is what it looked like:
Its much more clear now just after a few hours.  Now it will sit for at least 14 more days before bottling....So I need to find something else to brew up in the mean time!

Tuesday, January 17, 2012

quick update

Gearing up for racking the Kiwi Melon Pinot Girio tomorrow, I'm going to get some of the cleaning out of the way so all I have to do is sanitize and get started.  Will upload pics and a write up.

I have a decent amount of everclear left over from when I made Apple Pie Moonshine and I am trying to decide what to make with the rest of it... maybe:
1.Limoncello  (an awesome italian drink I had in Florence, here's a link wikipedia)
2.Limecello  (similar to the above drink with limes)
3.Pearcello  (with pears)
4.Coffee Liquour  (I saw a recipe on instructables)

What do you think I should make? I will post the recipe, steps, pics, etc too
Please vote on the right!  Thanks!

Sunday, January 8, 2012

Messing around

The fermentation of the kiwi melon pino grigio seems to be doing fine.  It looks like I will be racking it around the 18th into the secondary if all goes well.

The "Smash" is done and ready to be bottled.  Lucky helped me brew this batch when he was visiting.  Lucky and I call it Smash because well, it gets you smashed as we found out.  It is an old recipe from my great grandpa and is a type of wheat malt/wine.  It has a very deep brown color and it smells very sweet (and tastes absolutely amazing before you put the yeast in) until its fully fermented.  Then it smells more like a mild whiskey.  Basically, it consists of malted wheat (I used red malted wheat from Briess), white and brown sugar, raisins, and water. It takes about 7 weeks until you can bottle it up and drink it.  It also definitely changes flavor over time too, going from a lighter crispy flavor to a deep earthy flavor. 

It is great stuff and this time I had enough raisins (for tannin and a bit of color) so I am interested to see if it tastes any different than the last time I brewed up a batch.  I just have to go through with the filtering process, which is always sticky mess with this stuff for some reason.  I think I might try racking it and letting it clear up a bit before I bottle it.  Last time I still had a bit of murky stuff in the bottom of the bottles.

I think I might mix up some more "Apple Pie" if I go to the store tomorrow.  I made a batch before Christmas and took most of it home with me over the holidays so it didn't last long.  Apple Pie is typically made with moonshine, but there is a legal way to do it with high ABV grain alcohols like Everclear.  It tastes so smooth and just like eating a piece of apple pie.  There are quite a few recipes for it online or you can get in touch with me if you need one. 

Wednesday, January 4, 2012

First time with flavored wine...

I only have one bottle of wine left!  An old Malbec I made about 2 years ago... I find this to be unacceptable.  I went through my last batch pretty quick from cooking, gifting, drinking, etc. so it is definitely time to get to work.  Over the holidays I grabbed 2 wine kits, one red and one white and I still have a beer kit waiting as well.

Last night I stared one of the new wine kits, "Kiwi Melon Pinot Grigio" that my wife picked out.  A Cru - Orchard Breezin' Mist from RJ Spagnols.  I have used RJ Spagnols kits before but this is the first from the Cru orchard breezin mist line.  Its a 4 week kit and  I should end up with 25 - 28 bottles when all is said and done (most 6 gal. kits say 30 bottles, but when I rack the wine off the settling I steer clear of the murky stuff and lose a few bottles). 


-I went to the store and picked up some gallon jugs of distilled water.  I've had some really great results using distilled water in brewing, plus it's cheap.  The last two times I used tap water the wine took a extra long time to smooth out (I'm talking 9+ months after bottling) so I'm not screwing around with the tap water anymore.

-Next came cleaning and sanitizing.  All of the books and instructions about brewing tell you to be sure to clean and sanitize everything.They are right, everything that touches your brew (buckets, bottles, spoons, thermometer, everything) needs to be cleaned and sanitized otherwise you risk destroying the entire batch with bad bacteria or yeasts that could make you sick or turn your wine into a rancid vinegar.  I usually use a "no rinse" powder when I clean everything, the stuff is handy and works great, I just throw some of it in the sink and get to work with a wash cloth I use only for cleaning my brewing equipment.  After I get everything cleaned I empty the sink and put some sanitizer liquid in the sink.  I use Potassium Metabisulfite.  Its usually 3 tbsp per gallon of water to sanitize and you can get the stuff from a homebrew store or website on the cheap.  I usually mix a batch up and keep it in a glass jug like this old rum bottle


Make sure you mark it so no one thinks its clear rum hahaha, you don't want to drink this stuff. 

After the sanitizing, I waited for the stuff to dry a bit and then I rinsed it off.  Make sure you rinse everything off after sanitizing.

-Now I got started on mixing everything together.  It took me longer than usual because I had a bit of trouble getting the water warmed up between 68-86 degrees for the first steps of the kit.  The temperature dropped outside and the apartment was pretty cold too.  So I just put some of the jugs of water in the sink, in warm water.  I microwaved about a half gallon too, for the bentonite powder to dissolve well.  Then I added the juice, rinsed the bag out with hot water and added that, and stirred it up a bit.  Next, I put all of the water I needed into the bucket, to the 6 gallon mark.

-Next came checking the temperature and specific gravity.  The temp was in right range.  The specific gravity was .1060, which is at the very high end of the accepted range for this kit.  I was already at the 6 gallon level, and near the top of the bucket so I let it go and put the yeast in.  This kit did not require me to "pitch" the yeast before adding it to the must.  So I just sprinkled the yeast in, the yeast was lavin ec1118.

-I filled my airlock with half sanitizing solution and half water and set the whole rig up on a folding chair in my kitchen under the heater vent to keep it a little warmer for now.  I will put it by the kitchen door on the floor for the secondary most likely.

Now we wait.

This morning the brew was already showing signs of fermentation (air lock bubbling slowly) so the yeast must be working so far.

New Year

I've been brewing for a few years now and I figured a blog would help me keep track of the process (im bad at taking notes on paper) and also help anyone out that may be new to brewing or help someone who wants to get started. I plan on putting up my notes, recipes, pics, successes, and failures. 

Feel free to leave comments or email me if you have any questions or whatever about home brewing.

I've done a lot of wine, both from kits and from grapes, a few malts, and I'm venturing into the world of beers.

I just started another 6 gallon batch of wine last night and realized I didn't write down any notes so that will probably be the next post.